Wireless robotic lawn mower guide

Tired of spending your weekends behind the mower? Imagine a flawless lawn without lifting a finger: that's the promise of the cordless robotic mower. However, choosing the right model isn't just a matter of price; you first need to understand how it will communicate with your garden. Let's break it down together to avoid disappointments.
Key Points to Remember
- Do not choose a robotic mower based solely on the maximum announced area, but on its real battery life, cutting width, and ability to handle your slopes.
- The navigation technology (GPS, camera, or random) should be chosen according to the complexity of your terrain for efficient mowing.
- For a healthy lawn thanks to mulching, mow very often (every 2 days) and only cut one or two centimeters at a time.
- Anticipate annual maintenance costs (blades) and battery replacement after a few years for a controlled budget.
- Proper winterization (cleaning, charging, and dry storage) is essential to extend the life of your robot.
How to assess a robot mower's capacity for your garden?
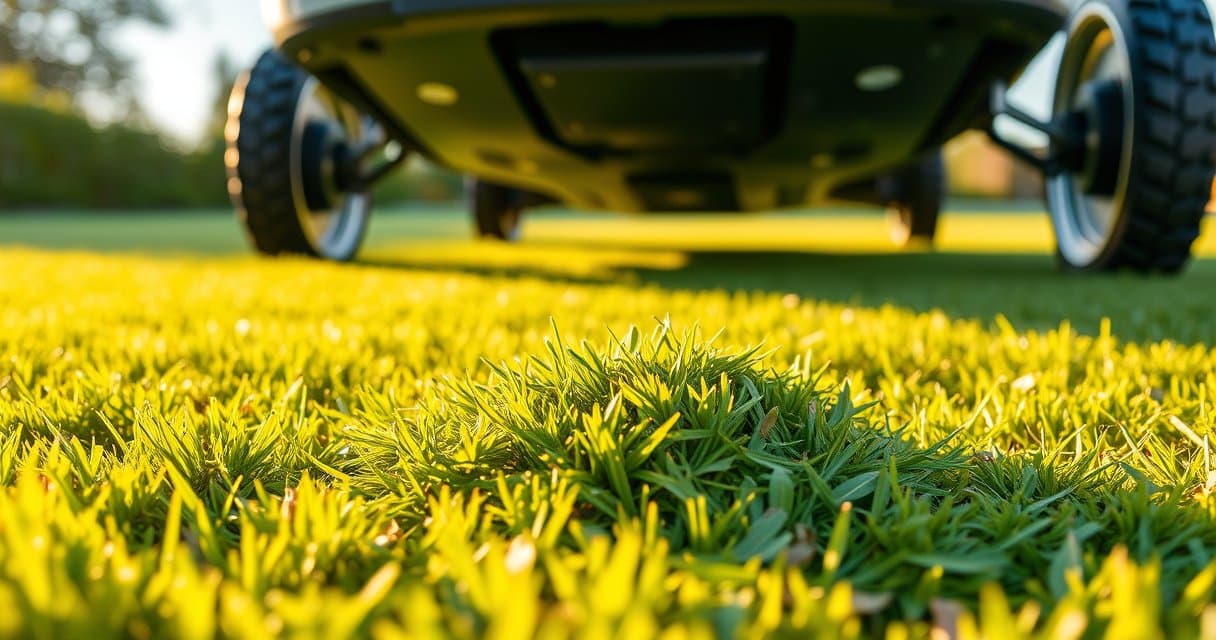
Above all, don't make the mistake of only looking at the "maximum" surface area announced by the manufacturer. It's a trap. This figure is calculated under ideal conditions, often on a perfect rectangle, without slopes and in a temperate climate. In reality, a robot's capacity is judged on three pillars: the battery, the cutting power, and... your patience.
The Battery: Real autonomy makes all the difference
The key figure is the effective mowing autonomy. A robot advertised for 1000 m² might have a battery that lasts 60 minutes, and another one 120 minutes. Which one would you buy for a garden with narrow passages and trees? Obviously the second one, because it will spend less time recharging. For a 500 m² garden, aim for an autonomy of at least 50 minutes. For 1000 m², you need 90 minutes at a minimum. Frankly, below that, it will spend more time on its base than on your lawn.
Power and Cutting Width: For thick or tall grass
Here, you shouldn't rely only on volts. Look at the cutting width. A model with a 16 cm blade will have to make more passes than a model with a 22 cm blade to cover the same area. For a small, well-maintained urban lawn, 16-18 cm is enough. For a country garden where grass grows fast and thick, you need power and a width of at least 20 cm. Otherwise, the robot might struggle and leave poorly cut rows.
A table for a quick overview
Here is how to translate the theory to your case. These estimates include a safety margin for a garden with a few obstacles.
| Type of Garden | Indicative Area | Recommended Mowing Autonomy | Advised Cutting Width | Practical Note |
|---|---|---|---|---|
| Urban Courtyard | Up to 300 m² | 40-60 min | 16-18 cm | A small model will do, priority to quiet operation for the neighbors. |
| Family Garden | 300 to 800 m² | 70-100 min | 18-20 cm | This is the core market segment. Check slope handling carefully if you have any. |
| Large Property | 800 to 1500 m²+ | 110 min and more | 20-22 cm | Don't compromise on autonomy. An undersized model will wear out in one summer. |
My personal advice? Always leave a margin. If your lawn is 600 m², look at models advertised for 800 m² or more. It costs a bit more upfront, but you guarantee it a long life without overwork. A robot always working at the limit of its capacity is a guaranteed breakdown within two years.
Managing Slopes, Obstacles, and Terrain Shape
This is where the technical specifications meet reality. A robot can be a champion on paper and become a disaster in your garden if the terrain resists it. You don't choose a 4x4 for city driving, nor a city car for a forest path. Same logic.
Slopes: The First Test
The maximum slope advertised (25%, 35%, 45%) is a laboratory measurement, on perfectly dry and clear ground. In real life, with morning dew or slightly long grass, you must immediately subtract 5 to 10%. A 30% slope is already very steep, almost impossible to climb on foot without leaning forward.
- Gentle Slope (< 20%): Most robots handle it, even entry-level models.
- Moderate to Steep Slope (20% to 35%): Here, you absolutely need a model with high-performance drive wheels and well-distributed weight. Smooth plastic wheels will slip.
- Very Steep Slope (> 35%): This is the domain of high-end models. And even then, make sure the robot can also descend this slope safely, without tipping over. A simple test? Place your manual lawnmower on the slope. If it slides or is unstable, your robot will have a significant challenge.
Obstacles and Narrow Passages: The Robot's Gymnastics
Trees, flower beds, patio edges... that's daily life. Bump sensors do the job, but repeatedly, they waste a lot of the robot's time. For narrow paths less than 1 meter wide, prioritize a model with proven maneuverability, often linked to a front-wheel steering system. High borders (over 3 cm) are another trap. Many robots get "beached" on them, their front wheels hanging in the air. A solution? Create a small ramp of earth or fine gravel on the side to facilitate passage.
Isolated Areas and Terrain Shape
This is the point everyone always forgets. Do you have a strip of grass behind the garden shed, accessible only through a narrow passage? A robot without a perimeter wire can, in theory, get there. But its random or semi-random navigation logic might take days to "discover" it. For these cases, some models allow you to define priority mowing zones via the app. Otherwise, frankly, plan to mow that corner by hand from time to time. The ideal is to simplify the route as much as possible: group flower beds together, create wide passages. You will optimize the robot's work and extend the battery life per session. An L-shaped garden or one with multiple isolated areas simply requires more coverage time, it's mathematical.
Our Selection
Here is our selection of three autonomous robotic lawnmowers, all equipped with the latest RTK navigation and artificial intelligence technologies. We have analyzed their technical specifications and community feedback to help you see more clearly. Each model meets a different need in terms of area, garden complexity, and control expectations.
Robotic Lawnmower Comparison
| Product | Max Area | Navigation & Avoidance | Narrow Passage | Max Slope | Main Strengths |
|---|---|---|---|---|---|
| ECOVACS GOAT O800 RTK | 800 m² | RTK + Vision & LiDAR (AIVI 3D) | 70 cm | 45% | Automatic mapping, precise edge cutting, very narrow profile (40 cm) |
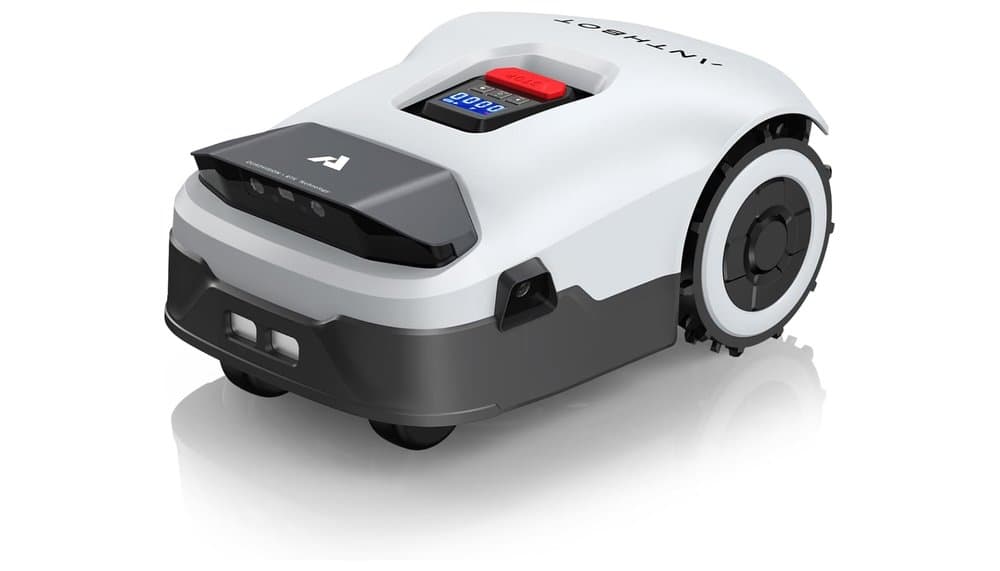
| ANTHBOT Genie600 | 900 m² | RTK Multiband + 4 cameras | 70 cm | 45% | Advanced multi-zone management (20 zones), 300° vision, intelligent management mode |
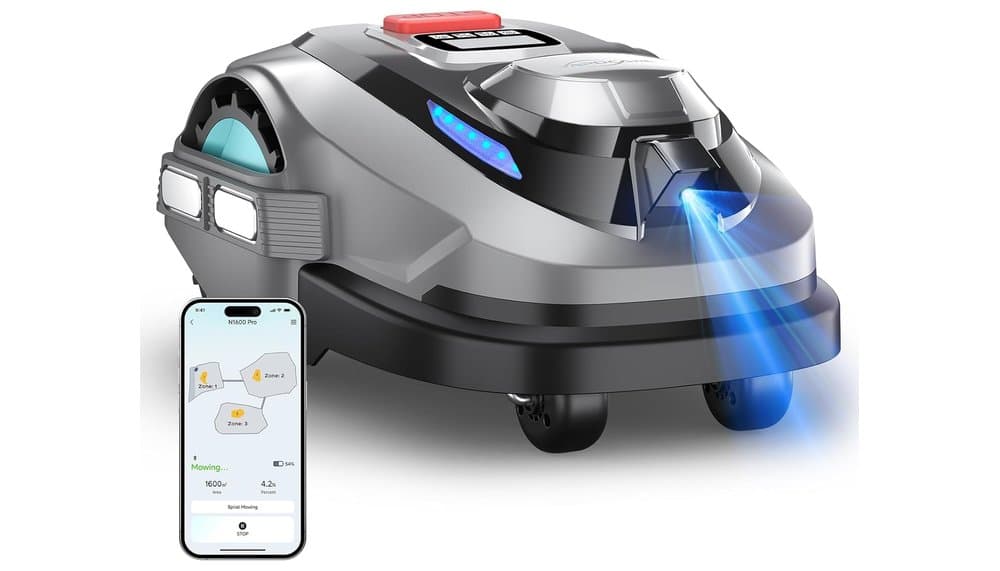
| YARDCARE N1600PRO | 1600 m² | RTK + AI Vision | Not specified | 45% | Extended autonomy, optimized U-shaped cutting, resume after recharging |
ECOVACS GOAT O800 RTK
The GOAT O800 positions itself as a specialist in precise and autonomous mowing for medium-sized gardens (up to 800 m²). Its major asset lies in its fully automatic mapping. According to user feedback, this feature greatly simplifies installation, as the robot detects the terrain boundaries itself without needing perimeter cables. Its width of only 40 cm allows it to slip through passages as narrow as 70 cm, a strong point for gardens with many narrow access points.
The navigation combines a powerful RTK signal and a camera & LiDAR vision system (AIVI 3D). The technical specifications indicate it can detect over 200 types of obstacles, which, on paper, promises good safety and avoids snags. The community also notes the edge cutting function which allows for a neat finish along paths or flower beds.
However, some feedback points out that optimal efficiency depends on a correct installation of the RTK station, which requires an open location. Its battery life of about 65 minutes may require recharge cycles to cover large contiguous areas.
ANTHBOT Genie600
The ANTHBOT Genie600 targets users with a garden requiring segmented management. Its main selling point is the ability to manage up to 20 different zones via the app, with individualized mowing settings. This flexibility is appreciated by users with complex spaces and lawns with varying needs.
Its navigation relies on a Multiband RTK system coupled with four cameras, offering a 300° field of view. Available reviews highlight the positioning accuracy and the ability to operate even in areas with low satellite coverage, such as under trees. The intelligent management mode, which adjusts mowing schedules based on weather and season, is also noted as a practical plus.
The specifications announce a maximum area of 900 m² and a capacity to climb slopes of 45%. Although very comprehensive, this model requires a more in-depth initial setup to define the multiple zones. Its weight of 12 kg is also slightly above average.
YARDCARE N1600PRO
The N1600PRO is designed for large areas, with an announced capacity of up to 1600 m². Its main technical asset is its U-shaped mowing algorithm: it starts by cutting the edges, then makes U-shaped passes to optimize coverage. According to the descriptions, this logic aims to avoid missed spots and repetitions.
It also includes a very practical "Resume" function: when the battery is low, it returns to charge and then resumes exactly where it left off, without having to restart a complete cycle. Its battery life of 100 minutes is consistent with its "large garden" target. Feedback, although limited, praises its quiet operation (60 dB).
On paper, the app allows complete control, including defining no-go zones and receiving OTA updates. However, it can be noted that information regarding the minimum passage width is less detailed than for its competitors, a point to check if your garden has very narrow passages.
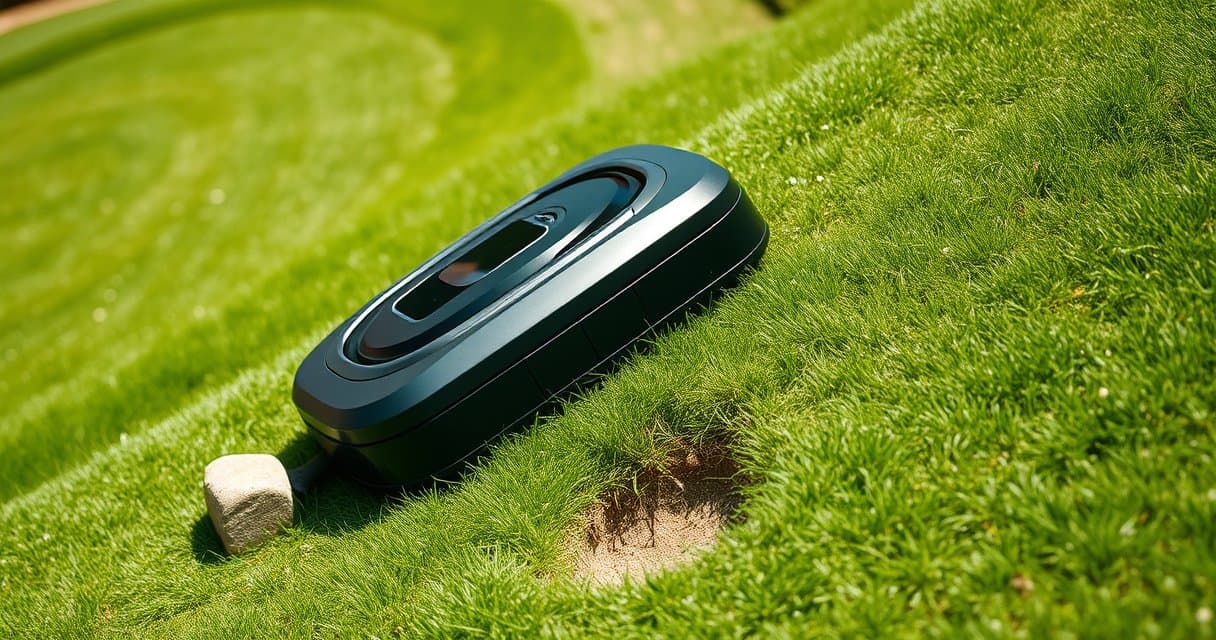
How Does a Perimeterless Cordless Lawn Mower Work?
The magic lies precisely in the fact that there is no longer a cable to bury to define the area. But then, how on earth does it manage not to end up under your car wheel or at the neighbor's house? That's the central question. Manufacturers have developed several strategies, more or less sophisticated.
Satellite Mapping (GPS RTK)
This is the most elegant method on paper. You place a small reference station in your garden (on a pole or a wall). This station communicates with satellites to know its exact position down to the centimeter. The robot, also equipped with a receiver, locates itself relative to this station. Result: it always knows where it is on a virtual map of your garden that you have previously drawn in the application.
The big advantage? You can control everything from your smartphone: create no-go zones (the vegetable garden, the swimming pool), define time slots to mow a specific area, and achieve a perfectly methodical cut in parallel lines. The drawback? It is the most expensive technology, and the station must have a clear view of the sky. Under thick tree cover, the signal can be disrupted.
Visual Navigation and Artificial Intelligence
Here, the robot largely manages on its own, like a self-driving car. It uses one or more cameras to see its environment, recognize lawn edges, trees, and pathways. An algorithm analyzes these images in real-time to build its own map and decide where to go.
This is impressive because the device adapts to changes (new garden furniture, an enlarged flower bed). But in very sunny weather or at nightfall, the "sight" can be less reliable. The most advanced models combine this vision with inertial sensors (like a gyroscope) to keep their course even with their eyes closed, so to speak. It's a booming technology, often more affordable than GPS RTK.
"Intelligent" Random Navigation
Don't underestimate it. This is no longer the simple, disorderly bouncing of the first robots. The device uses a multitude of sensors (ultrasonic to detect obstacles at a distance, wheel rotation sensors to estimate the distance traveled) and software that avoids unnecessary repetitions.
Concretely, it will mow in an apparently random manner, but its algorithm allows it to remember already cut areas and focus on those that are not. It always ends up covering everything, but it may take more time and its path is less aesthetically pleasing to watch. It is the most economical solution and often very effective for simple-shaped plots.
My opinion? If your garden is an open rectangle, intelligent random navigation is largely sufficient. As soon as the shape becomes complex or you want surgical control, you need to aim for mapping (GPS or camera). Cordless freedom comes at a price: either financial or in coverage time.
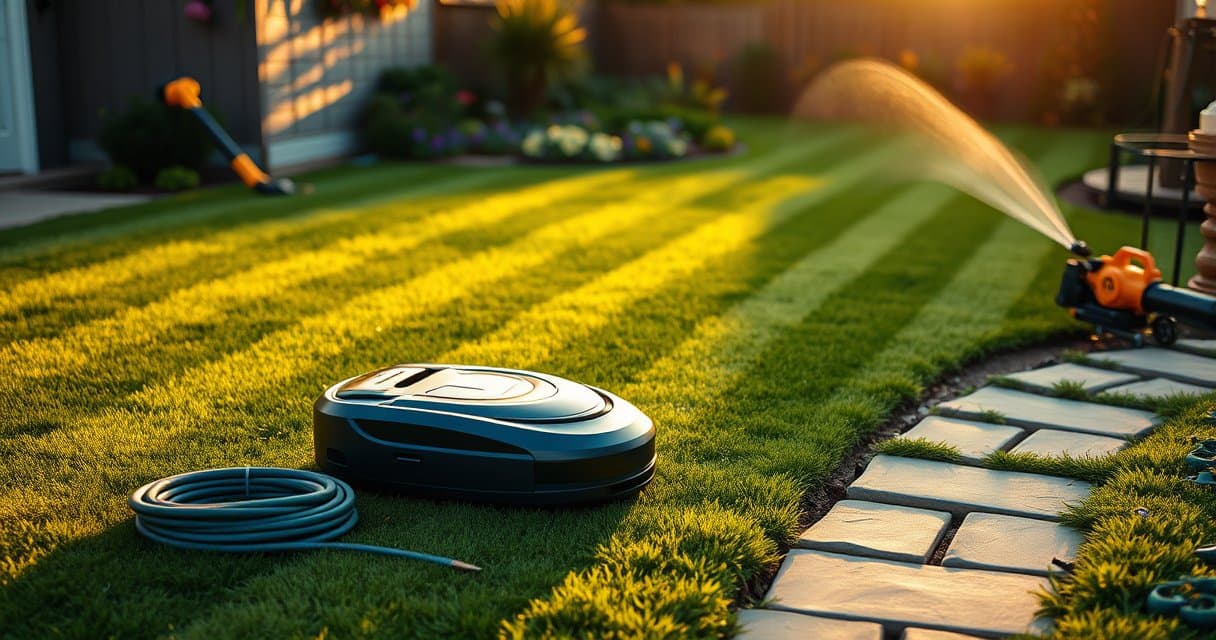
Adjusting the Cut and Managing Grass Clippings Daily
Here, we move from technique into the art of the gardener. A well-adjusted robot gives a dense, green lawn, not a yellow mat. It all relies on one simple rule: frequent mowing and mulching.
The Art of Cutting Height and Frequency
Forget the weekly mow where you cut the grass in half. The secret is to mow often, but very little each time. Set your robot to run every other day, or even daily during the peak season (April to June). Set the cutting height between 4 and 6 cm on average.
Why? The robot cuts grass blades into fine slivers that fall and decompose immediately on the spot. This is mulching. These microscopic clippings act as a natural fertilizer and retain moisture. But this technique only works if the clippings are tiny. If you wait too long between mows, the robot will smother the lawn under pieces that are too large and create thatch. A real headache later on.
Adapting the Program to Seasons and Weather
Your robot should be as seasonal as your wardrobe. In spring, with explosive growth, schedule daily runs. In summer, space them out to every other day, and slightly raise the cutting height (5-7 cm) to protect the soil from the sun. Most apps allow you to create multiple programs. Create one for "peak season" and one for "off-season."
And rain? Many models have a moisture sensor. They return to charge if the grass is too wet. This is essential. Mowing a waterlogged lawn is the best way to create ruts, stick mud everywhere under the robot, and get a disgusting result. Let it wait patiently in the dry.
What to Do with Tall Grass or After an Absence?
You're back from three weeks of vacation and your lawn is a jungle? Do not, under any circumstances, send your robot directly onto 15 cm of grass. It will choke, stall, and wear its blades unnecessarily.
The procedure: first use a traditional lawnmower (or a trimmer) to do an initial cut. Remove the clippings. Then, set your robot to its maximum height for a first pass. Gradually lower the height over several days until you return to your usual setting. It's a bit of manual work, but it's the only way to get the system running again without damage.
The Essential Little Cleanup
Even with perfect mulching, there are sometimes small piles of grass clippings left, especially in spots where the robot turns around. Once a week, walk around the garden with a lawn broom or give a light blow with a leaf blower to evenly redistribute these residues. It takes five minutes and is worth its weight in gold for the health of your lawn. Frankly, neglecting this step is an invitation for moss and thatch to settle in.
Anticipating Maintenance, Hidden Costs, and Winterization
You think the purchase is the main cost? Be careful. Like a car, a robotic lawnmower has a cost of use that needs to be budgeted. But don't panic, with a little organization, it's very manageable.
The Consumables That Will Cost You Each Year
The bill mainly comes from two parts: the blades and the battery. For the blades, plan on one replacement set per season if your lawn is larger than 500 m². This is an expense of 30 to 80€ depending on the models. Change them as soon as you hear the robot "tearing" the grass rather than cutting it cleanly. Dull blades strain the motor and damage the grass blade, exposing it to disease.
The battery is the major long-term expense. Even the best lithium-ion batteries lose capacity after about 3 to 5 years of intensive use. When you see the robot struggling to finish its zone before returning to charge, it's a sign. Replacement often costs between 150€ and 300€. A tip: always check the price and availability of the replacement battery before buying your robot. Some brands charge prohibitive prices for them.
Don't forget the small filters (on some models) and the cleaning solution for the sensors. A handful of euros per year.
The Essential Weekly and Monthly Routine
It's quick, but vital. After each major mowing (or once a week), turn the robot over. Clean the underside with a brush to remove compacted grass and dirt. Check the wheels so no clumps of grass block the rotation. Once a month, wipe the sensors (often located on the front and under the chassis) with a damp cloth. Dirty sensors mean a robot that gets lost, hits obstacles, and wastes its battery.
Also think about the charging station. Keep the metal contacts clean and make sure the entrance remains clear. A little white vinegar on a cloth works wonders against oxidation.
The Major Winterization Operation: Don't Even Think About Leaving It Outside!
When autumn sets in and the last mowings are done, prepare it for winter. Absolutely do not leave it in its station outside in the frost and damp. Here is the checklist:
- Deep Cleaning: This is the time for a thorough wash. Remove the worn blades, clean all parts, dry everything perfectly.
- Full Battery Charge: Charge it to 100%.
- Disconnect It: Remove the battery from the robot if possible. Otherwise, simply unplug the power supply from the station.
- Store in a Dry Place: Store the robot and its battery in a dry place protected from frost, like a garage or basement. A stable temperature between 5°C and 15°C is ideal.
- Recharge in Mid-Winter: If you have stored it for a long time, take it out in January and recharge the battery to 100% to avoid a deep discharge that would kill it permanently. This is the most important step that is too often forgotten.
Frankly, neglecting winterization risks cutting the lifespan of your device in half. It's a shame after such an investment. Take these twenty minutes, it's a comprehensive insurance policy.
Programming and Integrating the Robot with Your Other Garden Tasks
This is the great orchestration game. A robot does not work in isolation; it must fit into your gardening calendar so you don't hinder each other. The goal? A perfect lawn without your other projects being hampered.
Creating the Ideal Schedule: Don't Mow Just Any Time
Frequency is the key to successful mulching. Program it to mow little and often. This is much better than one big weekly session. Specifically, set it to work every two days during periods of average growth (spring, autumn). During peak heat or dry summer, space it out to every three or four days, as the grass grows slower.
Also choose its operating times tactfully. Program it during the day, on weekdays if possible, between 10 a.m. and 4 p.m. This is more courteous to your neighbors and avoids disturbing wildlife (like hedgehogs, which are nocturnal). Absolutely avoid very early morning, because of dew. Wet grass means poor quality mowing and risks of clogging under the deck.
Syncing It with Scarification and Aeration
Here is a crucial point that is often forgotten. Your robot leaves a fine mulch behind at all times. Before scarifying (i.e., deep raking to remove moss and thatch), you must give it a stop period. Stop the robot 5 to 7 days before scarifying. Why? To let the grass grow a bit taller and be more robust against the brutal pass of the scarifier.
After scarification, the soil is covered in debris. Do not restart the robot right away! Wait until you have thoroughly raked and collected this waste. Otherwise, you will fatally clog the blades and chassis. Allow for a 2 to 3 day pause after the operation.
For aeration (which creates small holes in the soil), the principle is similar: stop the robot one day before, and only restart it once the small soil plugs have properly broken down (about 2 days after).
Managing Seeding and Fertilization Periods
Have you reseeded an area? A complete stop is mandatory. The young shoots must be robust enough before undergoing the passage of wheels and blades. Wait at least 3 to 4 weeks, enough time for the grass to reach good density and a comfortable height. Program your robot on a reduced area that excludes this patch, if your model allows it.
For fertilizer spreading, it's simpler. Just avoid operating it on the day of application, especially if you use granular fertilizer. Let the granules dissolve and penetrate the soil during a good rain or watering session. Restart it the next day, that's perfect.
Coordinating the Robotic Mower with a Conventional Mower?
It might seem odd, but yes, it's useful! For edges, tight corners, and places the robot cannot access, your traditional lawn mower remains essential. The real trick is to set it to the same cutting height as the robot, or slightly lower (for example, robot at 5 cm, manual mower at 4.5 cm). This avoids creating unsightly "steps" of grass between the central area and the edges. Do this finishing touch once a week, it's largely sufficient.
Conclusion
Voilà, you have all the cards in hand. Choosing a battery-powered robotic lawnmower is not just about buying a gadget. It's about engaging a silent and efficient working partner for your garden.
Take the time to analyze your terrain and your real needs. A good match between the machine and your green space is the key to lasting satisfaction. The ultimate goal? To reclaim time for yourself, while having an impeccable lawn.
Let go of the lawnmower handle. Your future weekend awaits.
Frequently Asked Questions
How do I choose a robotic lawnmower for a 1000 m² garden?
For a 1000 m² garden, aim for an effective mowing autonomy of at least 90 minutes and a minimum cutting width of 20 cm to guarantee efficient coverage without overworking the device.
What is the maximum slope a robotic lawnmower can climb?
The advertised maximum slopes (25% to 45%) are measured in a laboratory; in real conditions, you must subtract 5 to 10%, and a slope greater than 35% absolutely requires a high-end model with powerful drive wheels.
How does a robotic lawnmower work without a perimeter wire?
It primarily uses three technologies: satellite mapping (GPS RTK) for centimeter-precise location, visual navigation via camera, or "intelligent" random navigation based on sensors to cover the area.
What is the correct mowing frequency with a robot?
The rule is frequent mulching: program the robot to pass every two days, or even daily during the peak season, cutting only 1 to 2 cm each time to promote a dense and healthy lawn.
How do I maintain a robotic lawnmower for the winter?
Clean it thoroughly, fully charge the battery to 100%, disconnect it, and store the device in a dry place protected from frost, with a mid-winter intermediate recharge to avoid deep discharge.
100% free and independent — All our articles are written independently, without any sponsorship. We may earn a commission on purchases made through our links, at no extra cost to you.
Guides you might like

Buying Guide: Choosing Your Thermal Brushcutter
Guide to choosing a thermal brushcutter: Compare 2-stroke vs. 4-stroke engines and harness types for effective clearing of brambles and sloped terrain.

Ultimate Guide to Gas Mowers
Petrol lawnmowers provide power & autonomy for large lawns over 500 m². Key features & selection criteria for your garden explained.

Best Cordless Lawn Mower
Enjoy lawn care freedom: silent, instant-starting cordless mowers. Key tips on battery runtime & power selection for your perfect match.
Articles you might like

Scheppach MS175-51 Self-Propelled Petrol Mower Review
Scheppach MS175-51 petrol mower review: A detailed analysis of its performance and suitability for large garden areas with heavy-duty cutting needs.

SECURA Blade Set Review for Husqvarna YTH130 Tractor
Replace Husqvarna YTH130 blades with a budget-friendly, high-performance SECURA blade set for a perfect, even cut every time.

MRWiZMS Garden Tractor Cover Review & Test
Protect your ride-on mower or garden tractor from the elements with the MRWiZMS waterproof outdoor cover. Review, features, and fit details.